This is the companion page for the C++ for Beginners Video 10 – Multidimensional Arrays and Intro to Vectors
In this 10th video of the C++ for beginners series we will look at using multidimensional arrays. I will also be covering the auto keyword for data types, and utilizing the range-based for statement. We wrap up with a quick intro to vectors. I will be covering vectors more in-depth in the next video.
Multidimensional Arrays
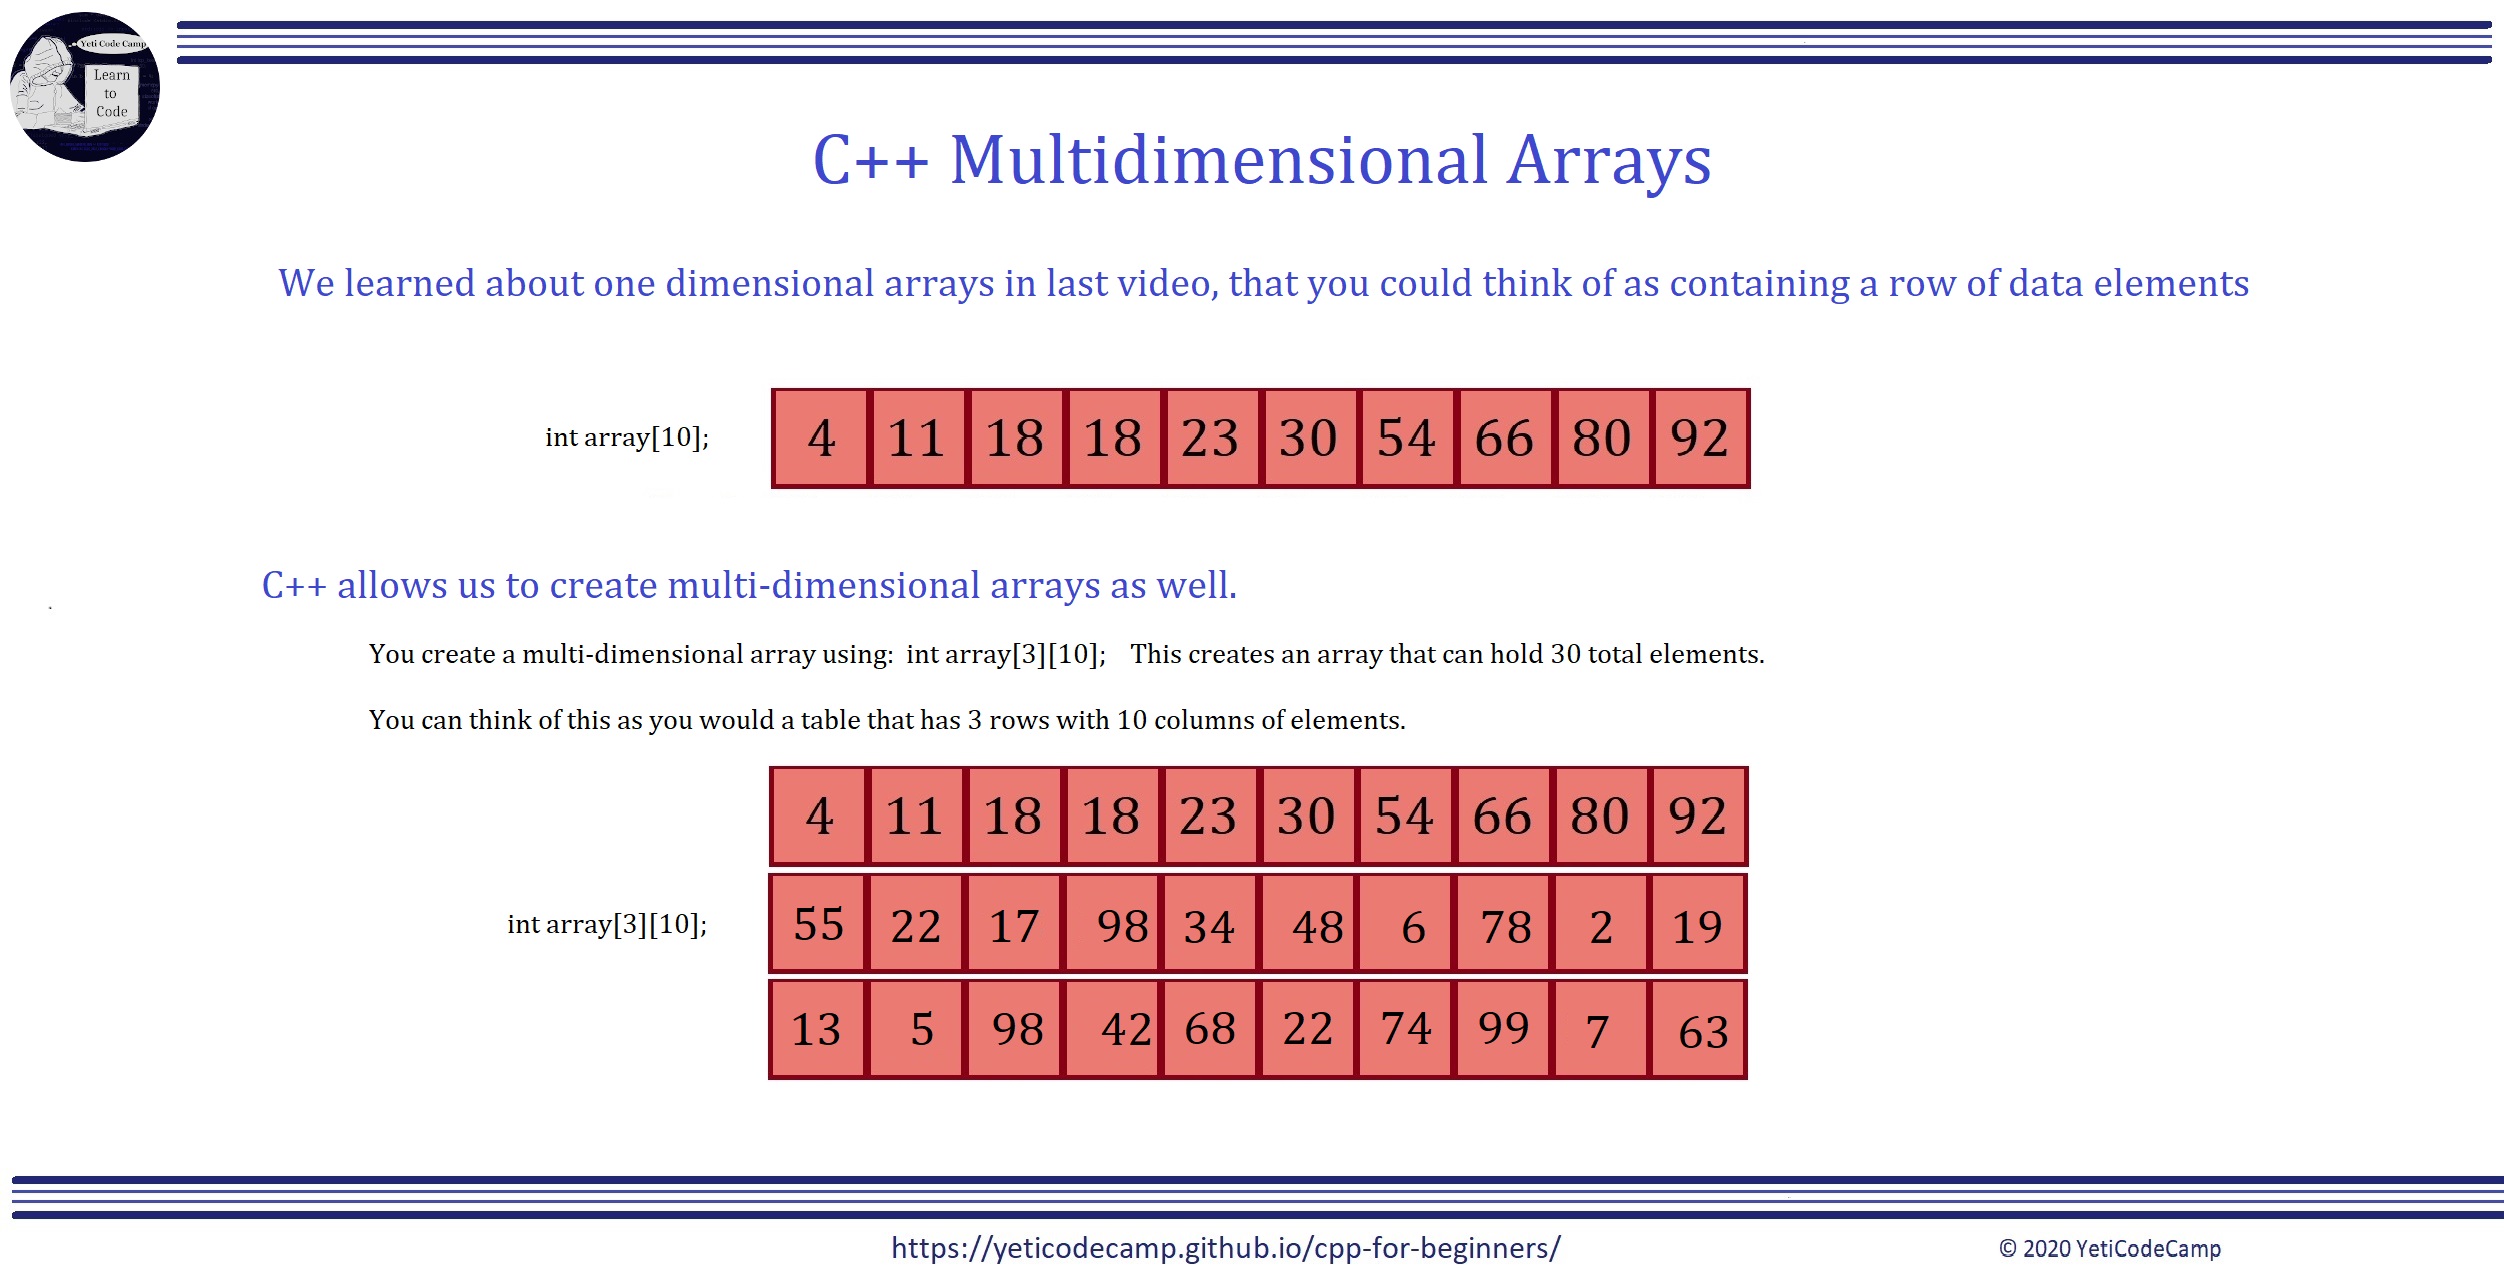
Multidimensional Arrays allow us to store and utilize data in more ways that resemble real world usage. You can think of a two dimensional array as sort of a table of data, with rows and columns making up the array elements.
int arr[3][5] { {1,2,3,4,5},{6,7,8,9,10},{11,12,13,14,15} };
The above example makes a 2D array of 3 by 5 elements. Think of it as 3 rows of 5 columns, like you would a table of data.
| index | 0 | 1 | 2 | 3 | 4 |
|---|---|---|---|---|---|
| 0 | 1 | 2 | 3 | 4 | 5 |
| 1 | 6 | 7 | 8 | 9 | 10 |
| 2 | 11 | 12 | 13 | 14 | 15 |
You can access the data using the form: array[row index][column index] where index starts at 0. So arr[2][2], refers to 13 in the above example. You go down to the index 2 row, and over to index 2 column, remembering to start with 0 for each (0,0 is an valid element and contains 1).
You can extract the contents of the array using a for loop as shown in this example:
std::cout << "\nDisplay Array contents using a standard 'for loop':" << std::endl;
for(int row=0;row<3; row++)                           // Outer loop controls which row we read
{
    for(int col=0; col<3; col++)                      // Inner loop controls which column we read from
        std::cout << arr[col][row] << " ";
    std::cout << std::endl;
}
By using nested for loops we can easily get the entire contents of an 2D array.
The first loop starts at zero, this is used as the first parameter in the output line where we are calling the array with arr[0][], so we want the 0 row.
The inner loop then iterates through the columns within that row. So again the loop starts at 0, so we fill in the second parameter with 0 as: arr[0][0] which then returns the value located at element 1,1 in the array and we print it to the screen using cout.
Then the inner loop increments again and the value changes to arr[0][1], and so on until it ends, which with this example would be at index 2 because we set the loop to col<3.
After the last column in row 0 prints out, the inner loop terminates, thus jumping back to the outer loop. The outer loop increments by 1 and sets arr[1][] then jumps to the inner loop again to repeat the entire process printing out all the elements in row 1.
Note that the square brackets are used to set the size only during declaration of an array, afterward they are used to refer to the index positions of the array that we want to access.
The auto Keyword
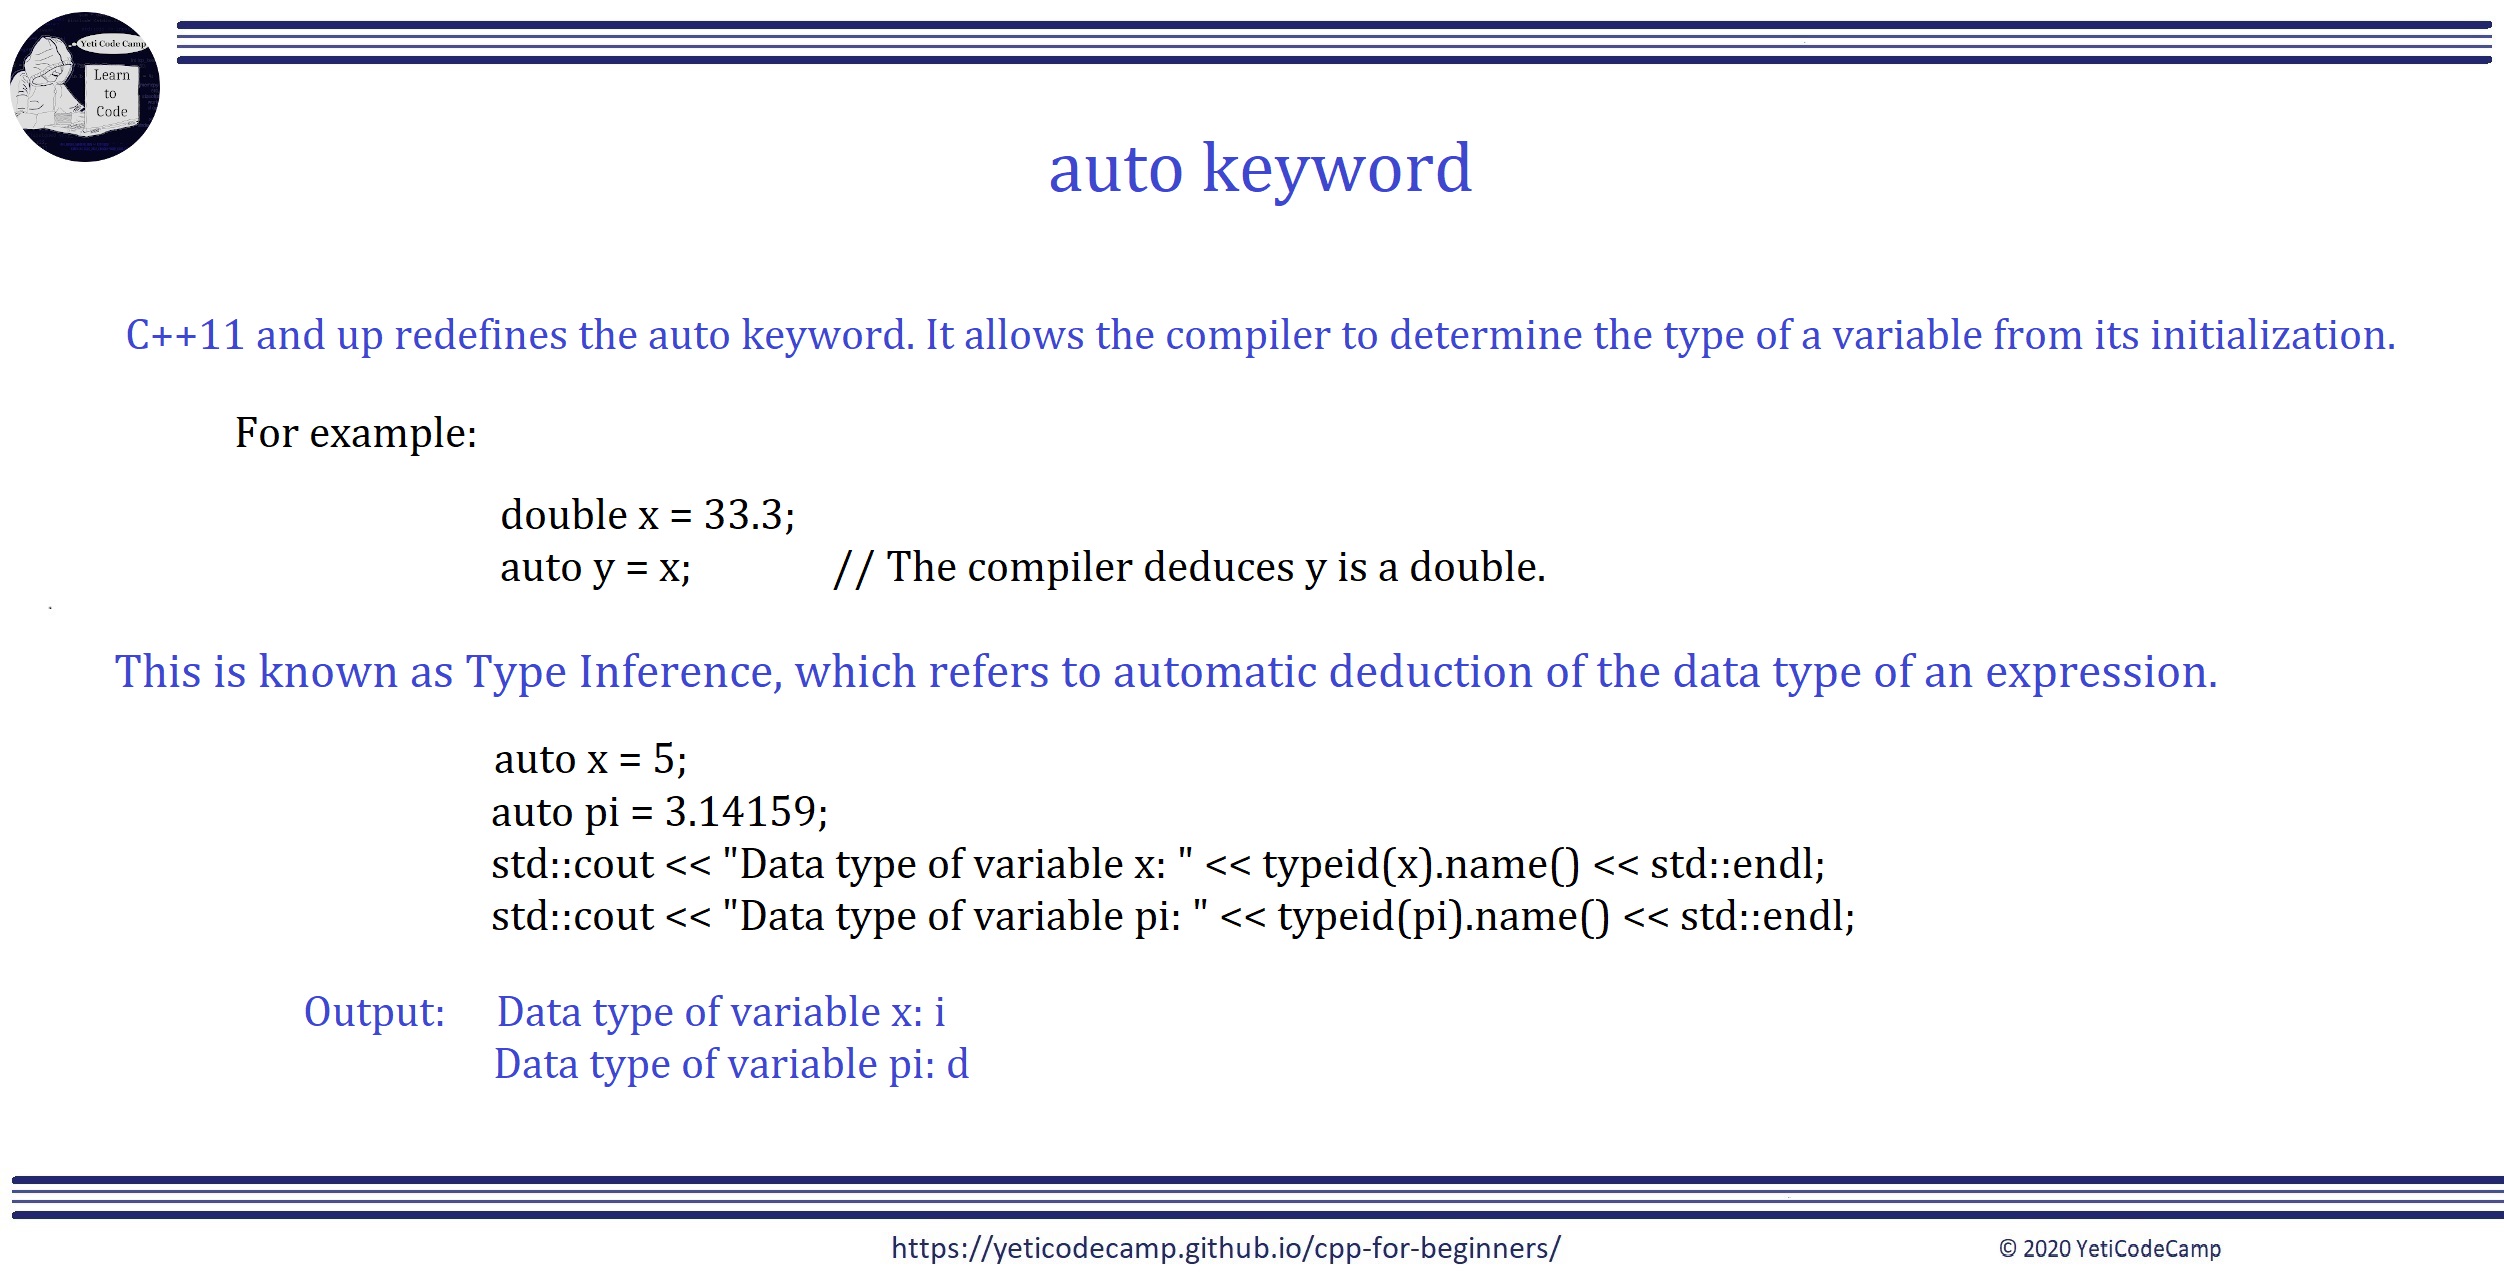
Starting with C++11, the “auto” keyword instructs the compiler to deduce the type of a declared variable from its initialization expression. Before this auto had a different purpose and thus will not work as expected if you are using an earlier version of C++. In our videos we are using C++14 for the introductory series, so you should be fine. You can double check in CodeBlocks by going to Settings->Compiler and making sure use C++14 box is checked.
The auto keyword allows us to forgo specifying a data type during the declaration of variables and lets the compiler assign it at compile time. The compiler does this type inference by looking at the value(s) assigned to the variable or object.
For example:
auto x = 17;
The compiler will deduce x should be an integer based upon the fact we assigned it an integral value, in this case 17.
auto pi = 3.14159;
The compiler will deduce pi should be a double based upon the fact we assigned it a floating point value, in this case 3.14159.
Do keep in mind though, the auto keyword is a placeholder for a data type the compiler will automatically determine, but auto is not a data type itself..
The decltype Keyword
The decltype (Declared Type) keyword derives the data type from the declared type of a variable or an expression. While the auto keyword allows you to declare a variable with particular type based upon initialization, decltype lets you extract the type from the variable.
Sounds complicated, but this example basically shows what’s going on:
auto pi = 3.141592653589
auto r = 5;
decltype(pi) cirArea = pi * r * r;
pi is auto set to type double as it was assigned a floating point number. r is auto set to type int as it was assigned an integral number. cirArea is also set to double, as the datatype is extracted from pi, which of course is of type double.
Range-based for Statement
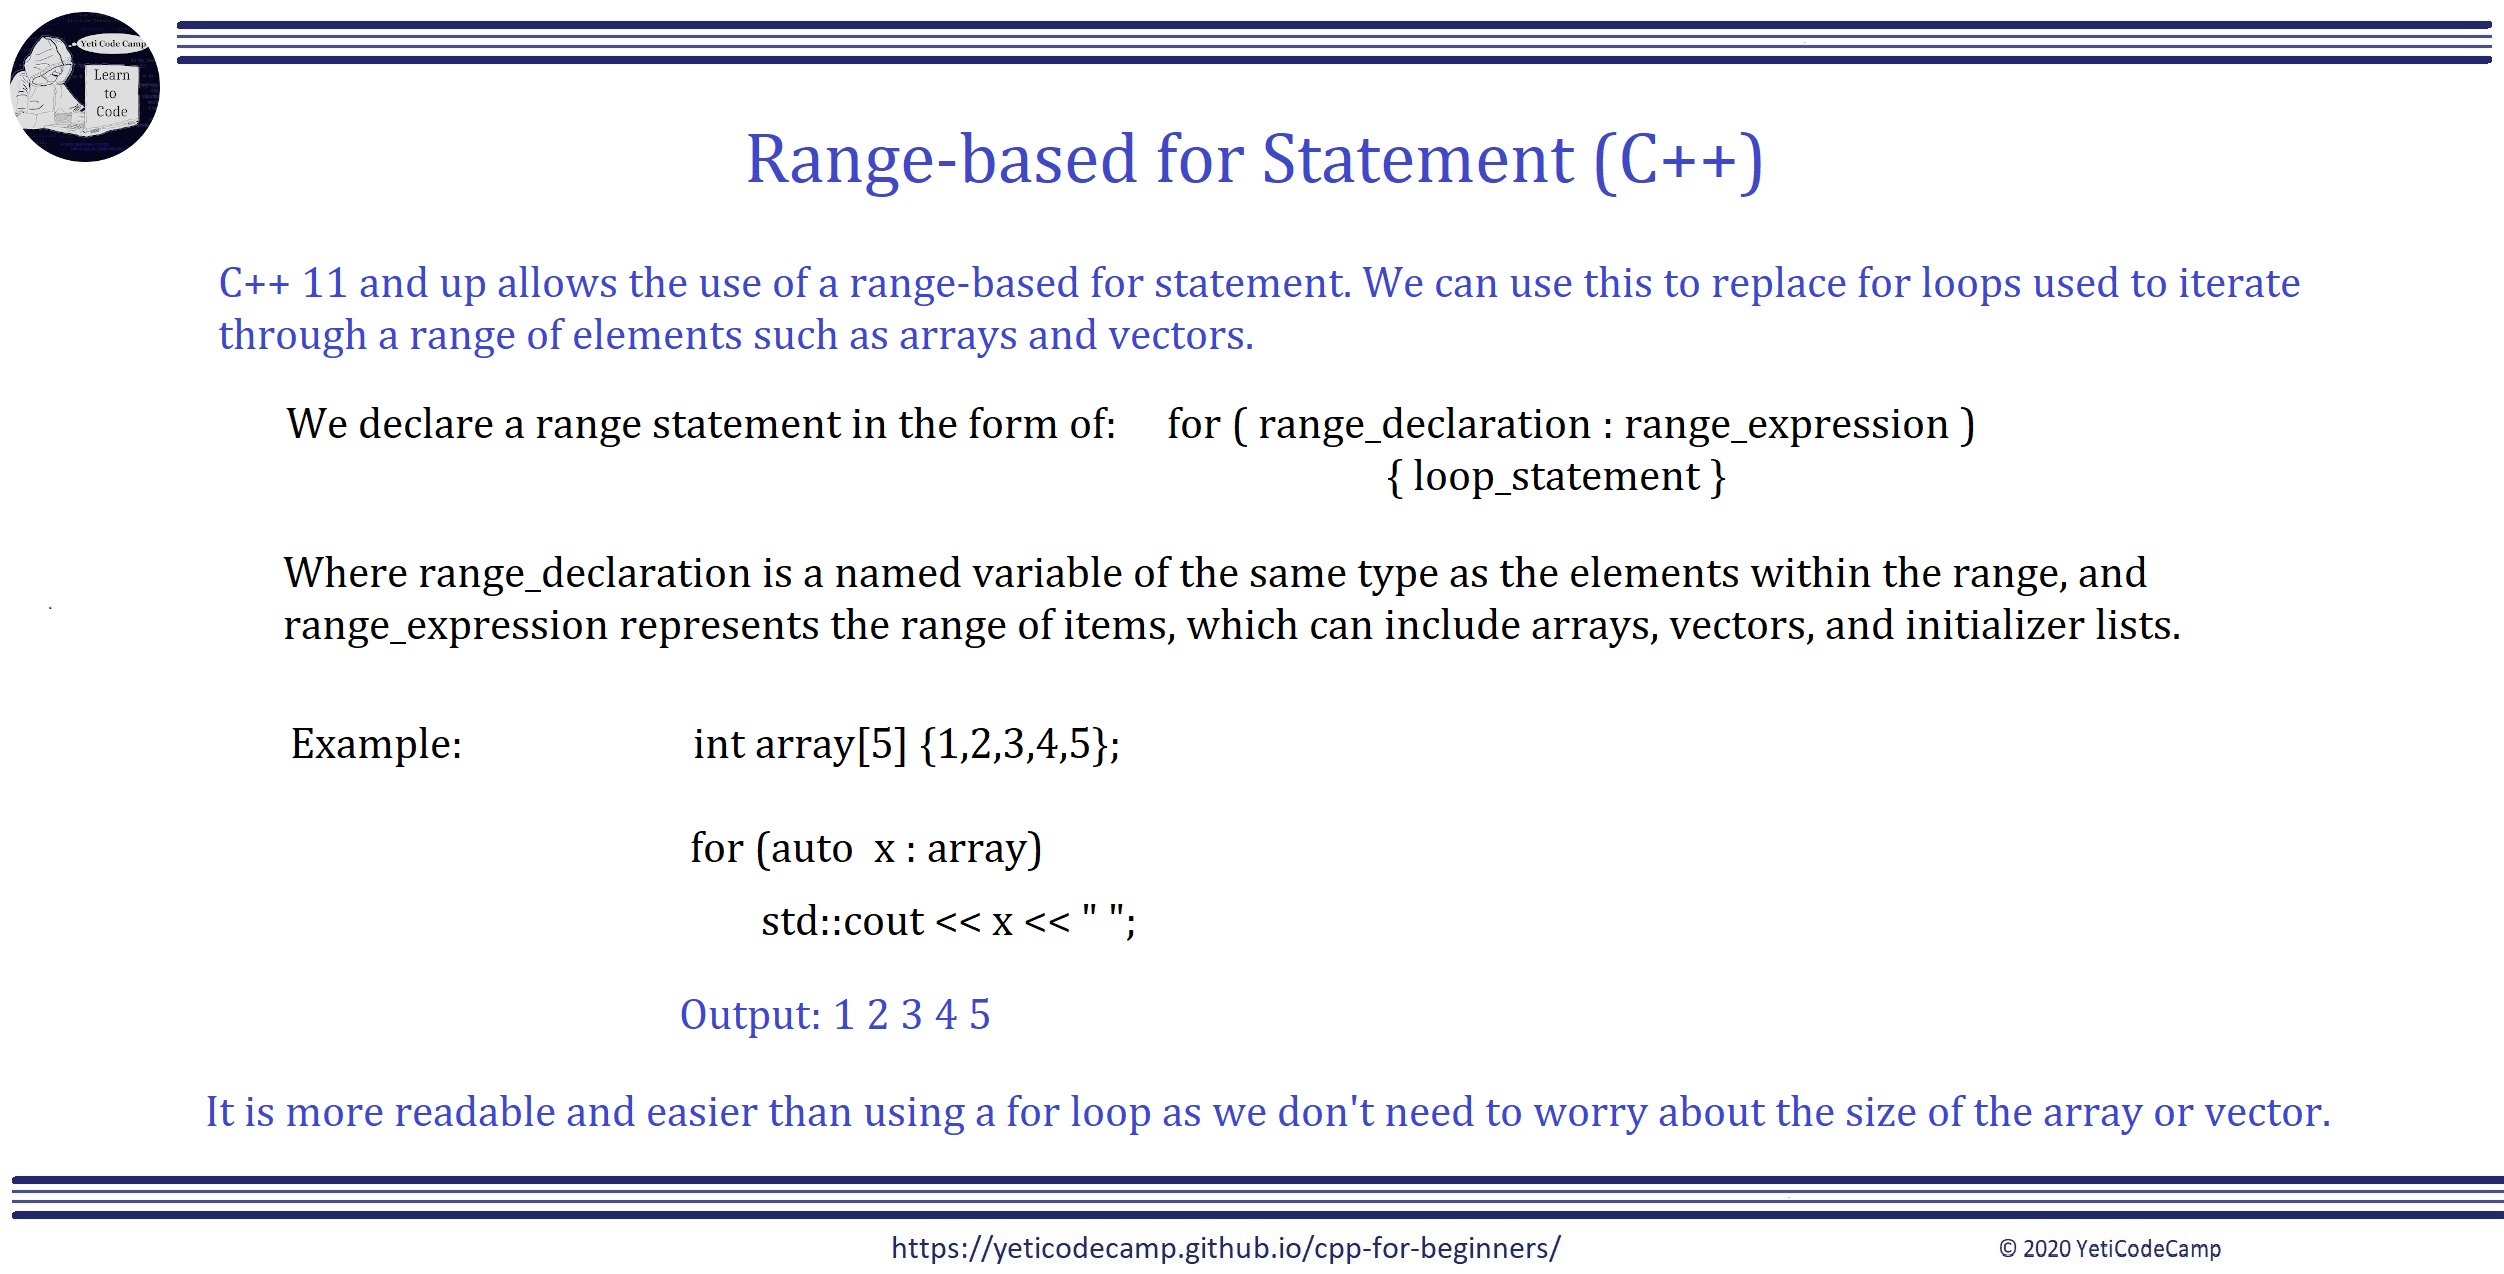
for(auto v : vec)
    std::cout << v << " ";
Similar to the ‘for’ loop, the range-based for statement allows us an easy way to iterate through a collection of items, like lists, arrays, or vectors.
Regular for loops still have their place, however, so don’t think of it as a replacement as much as an alternative in certain situations.
You can think of the range_delcaration simply as a variable used to hold the value of the element and range_expression being the object we are iterating though, such as an array name.
The name you use in the “range-declaration” (or variable) portion of the for statement is ‘local’ to the for statement and cannot be re-declared in the “range_expression” or “statement” sections of the loop. For example, the ‘v” in the above code snippet cannot be reused again within the body of the for statement. So if your vector was named v you could not use:
for(auto v : v) // NOT ALLOWED
For hopefully obvious reasons. You could however use something like:
for(auto v1 : v) // Allowed but could be confusing

for(auto v : v1) // Better by renaming vector.
Of course, you should probably give you vectors a more meaningful name in a real program, but I will often use simple v1, v2, v3 vector names for these example programs.
It is also recommended to use the auto keyword in the “range-declaration” portion of the statement instead of a specific data type.
for(int v : v1) // Work but limited to only integers

for(auto v : v1) // Better as it allows compiler to deduce proper data type
Vectors
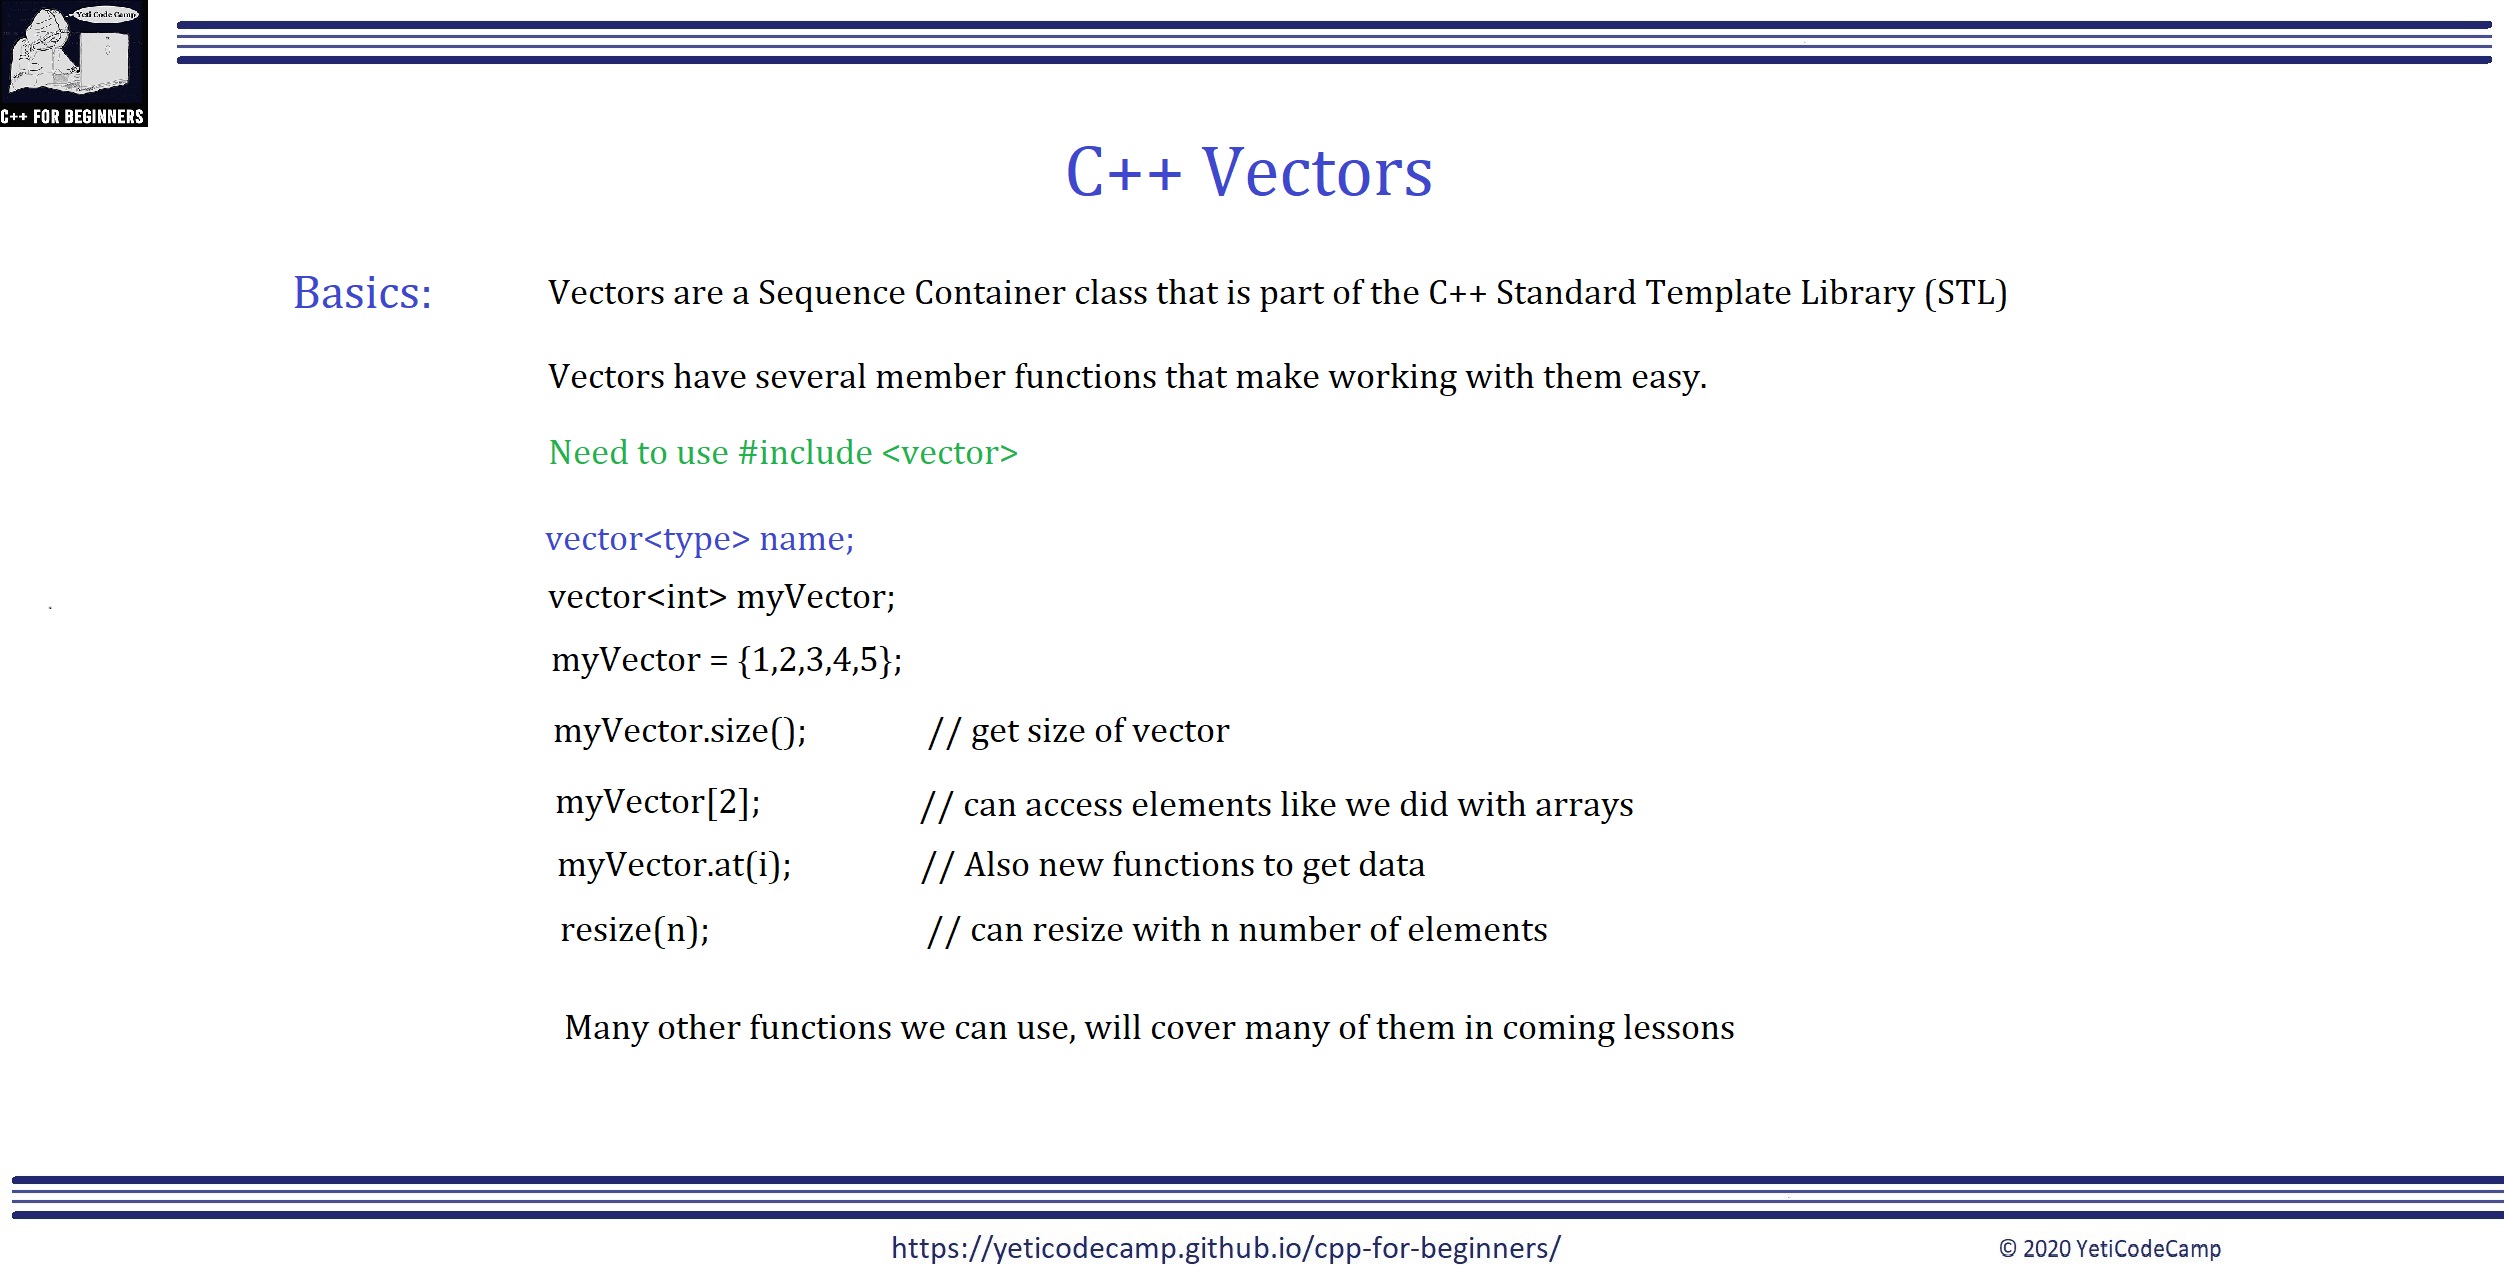
A vector is declared in the form of: vector
vector<int> v {1,2,3,4,5};
Vectors are part of the standard namespace, so if you are not the “using namespace std;” at the top of your program, you need to prefix vector with std:: liek you would with cout.
```cpp
std::vector
The following program creates a vector, assigns some initial values, then it uses the pushback function to add 3 more data items, and finally uses a range-based for statement to print the contents to the screen.
``cpp
#include
using namespace std;
int main()
{
std::vector
v1.push_back(97);
v1.push_back(98);
v1.push_back(99);

for(auto &v : v1)
    std::cout << v << " ";
std::cout << std::endl;

return 0; }
Output: 1 2 3 4 5 97 98 99
Much more information on Vectors will be available with Video 11 in the series.