Basics on Working with VIM

Vim is an advanced text editor that emulates 'Vi' found on most UNIX systems. While it does require an initial learning period, most programmers can quickly learn the basics within an hour of their first use, and it will become almost second nature after a couple of weeks of frequent editing.
This basic tutorial is designed from the perspective of using Vim for learning programming, namely creating and editing source code files, and this guide will help you get setup and using it in that capacity. As such it will be fairly basic and cover the minimal amount of commands we need to learn in order to perform these basic steps.
This guide is also being written from the perspective of Windows users. Linux users may already have Vim or an equivalent installed, however not you can also install Vim and with minimal adjustments for the most part follow along with the rest of the guide.
There are many, much more detailed, tutorials out there on using Vim that I suggest you consult if you are looking for more advanced functionality. You can start with the documentation found at the vim.org website.
There are also many plugins, some useful for software development, so feel free to explore these, but for this guide we will stick to the basics to get you going quickly.
Download and Install Vim
First, go to the Vim.org Downloads page and download the appropriate version for your system. On Windows I recommend downloading the gvim82.exe file.
Once the files has been downloaded, go into your downloads folder and double click on the gvim82.exe file to begin the installation. The install process is pretty straightforward, just watch for the prompts and follow the instructions. The default settings will work fine for most users.
The installer will offer the option to install both the GUI and console versions, you can install both if you want, but for this tutorial I will only be using the console version.
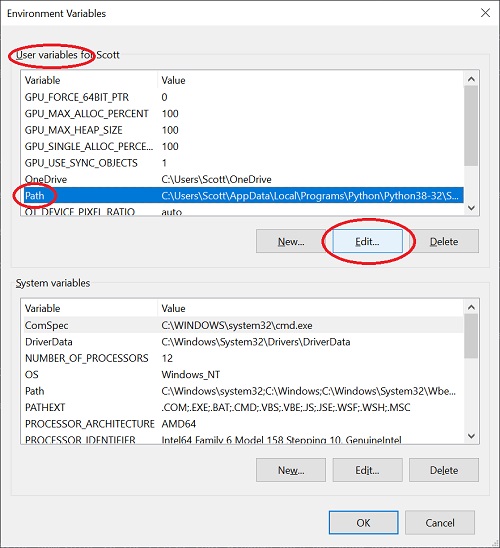
One final note, you will need to adjust your Path environment variable when finished.

To do this, simply navigate to:
Control Panel->System and Security->System (Windows + Pause/Break key shortcut), click on the Environment Variables button.
From here, look for the Path entry in the “User variables for
" section, and highlight it by clicking on the entry, then click on the edit button underneath. Inside the Edit environment variable window that appears, click on New and enter in your Vim path, which by default is either:
C:\Program Files (x86)\Vim\vim82
for the 32-bit (x86) installation, or
C:\Program Files\Vim\vim82
for the 64-bit version.
First Steps with Vim
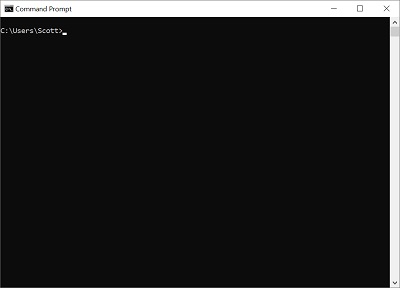
Once Vim has been downloaded and installed, open up a command prompt or use Windows PowerShell. Type "cmd" or "PowerShell" in Windows search and press enter.

If you typed "cmd" a new black console window should open, PowerShell is much the same but with a blue background and of course much more functionality, but the basic syntax is the same for our purposes.
Before we go too far, let's first create a new subfolder to hold our initial files. Create a new directory in your home directory (mine is C:\Users\Scott), maybe call it vim-tutorials, type "mkdir vim-tutorials" and press enter:
C:\Users\Scott>mkdir vim-tutorials

C:\Users\Scott>cd vim-tutorials

C:\Users\Scott\vim-tutorials>
Then use the cd command to change your working directory to the new vim-tutorials, as shown above. We can now use this directory to hold the initial files we will create and manipulate with Vim.
In the console window type:
C:\Users\Scott\vim-tutorials>vim new.txt
and hit enter.
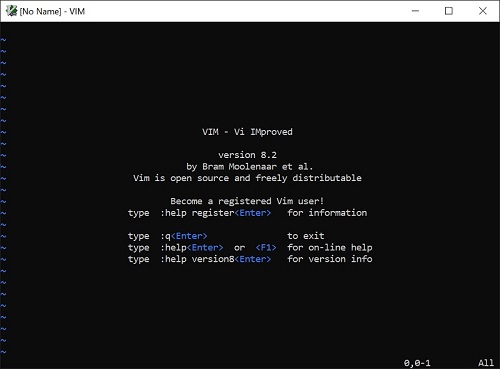
This opens up the console version of Vim and we can create, edit, and save files from within its interface.
For now, we can edit our 'new.txt' file by adding a new line of code. To do this in Vim first press the "i" key to enter into "insert mode". As the name suggests, insert mode allows us to insert and manipulate text.
Now go ahead and type in a new line of text:
Hello World. This is my first Vim file!
To save our file, we first need to exit out of insert mode by pressing the "esc" key. Then type in :wg (notice this appears at the bottom line of your console as it is a command) and then press enter, as shown below:
:wq
Now you should have exited the Vim program and be back at the command prompt, your console will look similar to the output below:
C:\Users\Scott\vim-tutorials> vim new.txt
C:\Users\Scott\vim-tutorials>
Congratulations, you just created your first text file using Vim!
By the way, the :wq we used above to exit Vim combines two commands, write file and quit.
You can now reopen the file in Vim by typing vim new.txt again, and exit this time just typing :q for quit since we didn't make any changes.
Note that the first time we used vim new.txt, since the file doesn't exist Vim makes a temp copy as we edit it and we need to use the :w command or in combination with quit :wq, to actually save it. If we try to exit without saving changes, by default Vim will display an error message. If you want to quit without saving changes you can type :q! to override the warning.
The second time we ran Vim, since the file already existed, we were able to open it and since we did not make any changes we could quit without issues.
If you want you can also open up Windows explorer and go the new directory we created above to see the new file, and you can even open it with notepad or something to confirm what we did. This is totally unnecessary of course, but new Vim Windows users sometimes like to double check things with tools they are already comfortable with when they first start out.
This is fine for now, but at some point you should ween yourself away from this habit. Once you become more comfortable using Vim, and possible the command line in general, you will most likely naturally move away from the GUI versions of these tools anyway.
One quick housekeeping note, up until this point I have been displaying console output using the full syntax as it would appear in the command window, such as:
C:\Users\Scott>cd vim-tutorials
While this helps new users to relate to the concepts, going forward I am going to be using a slightly cleaner approach to help focus your attention on the commands themselves, so using the above example I will now simply show the code we enter as:
cd vim-tutorials
It of course will show as the earlier example in your own console, but this way you can more clearly see the commands I am using.
Basic Commands with VIM
Now that we know how to create and save a file using Vim within the console, let's move on to a few more basic commands we can utilize.
The first thing you can do is simply start Vim without creating a file:
vim
type vim and press enter.
You are now in the Vim normal mode, sometimes called command mode, here you can type commands prefixed with ":" such as :help to explore the extensive help topics.
Inside help it gives you a lot of information. In the first section it instructs you how to use basic movement keys. I am not going to try and replicate the help file within Vim, but a few initial things worth noting are in the follow sections.
Insert Mode
We already used this mode in our sample program in an earlier section, but unlike most text editors you have probably used, in Vim you need to specifically enter into insert mode before you can interact with the text using your keyboard as you would normally expect. So to actually be able to type text into our program we need to be in insert mode.
To enter insert mode we can use the "i" key. To go back to normal mode so we can use movement or other commands, first use the Esc key. While in insert mode, --INSERT-- is displayed on the bottom line of our console.
Sample Vim text files
~
~
~
~
--INSERT--
For example, using the first program we created earlier as an example we used the key sequence: "i" to enter into insert mode, we then added some text, then we pressed "Esc" to go back into normal mode, and finally used the command :wq to write (or save) our file and then quit Vim.
While maybe not as intuitive as when using other text editors, don't worry, you will quickly grow used to the process if you stick with it.
Normal Mode
This mode is sometimes referred to as command mode. It allows us to efficiently move around and manipulate text.
Again, we have already used this mode as it is the first mode we are in when we start Vim.
From here we as you would expect enter commands and can use movement keys. We covered a few earlier, "i" to go into insert mode, and :wq to write and quit.
:w - We already know we can use :w to write a file, but this option will write a file even if the contents have not changed.
:update - We can use :update to only write the file if changes were made.
:w newfilename - Saves a copy of the file to a new filename (editor remains in original file) also can use :saveas newfilename
:saveas newfilename = Same a :w newfilename (see above).
:e filename - Opens an existing file from within Vim.
If you launched Vim with no arguments, meaning you are not editing an existing file, you will need to provide a file name when you save. You can do this with :w filename for example, :w myfile.txt. You can also use :saveas filename for example, :saveas myfile.txt.
:q - Quits Vim. If you are getting an error, you can force quit by using :q! (see below). You can combine commands, such as shown when we used :wq to first write then quit. As you would expect they are performed in order, so be sure to put the w before the q.
- ! - Force If you get warnings when trying to quit or save, you can override (ignore) this by appending “!” at the end. for example, say you want to write and quit without seeing a warning, type :wq! to force a write quit. Although this works, it is probably a good idea to figure out why Vim was warning you in the first place, especially once you start to edit more complex files.
- Some call this last-line mode and consider it a separate mode as when used it positions the curser to the last line waiting for you to enter a command.
Cursor Movement
Use the curser keys in insert mode, or in normal mode you can also use h to go left, j to move down, k to move up, and l to move right one position(left/right) or line(up/down).
You can also use the Page up and Page down keys to move a full screen up and down respectively (works in both insert and normal modes).
The following commands are used in normal mode, hit Esc first if in insert mode.
w - moves cursor one word forward (to first letter of the word)
b - moves cursor one word back (to first letter of the word)
e - moves cursor to the end of word (last letter of the word)
0 - moves cursor to beginning of the line (including spaces (if any)) also Home key works
^ - moves cursor to first character of the line (not counting spaces (if any))
$ - moves cursor to end of line (including spaces (if any)) also End key works
gg - moves cursor to the first line the file (including blank lines (if any))
G - moves cursor to the last line in the file (including blank lines (if any))
num - Where num is the number of a lines you want to move down to, i.e. 15 (Enter) would move the cursor down 15 lines.
Text editing
The following commands are used in normal mode, hit Esc first if in insert mode.
u - undo undos last change or action, (like Ctrl+z)
Ctrl-r - redo “undos” the last undo
x - deletes character the cursor is currently on (Del key also works)
r - replaces the character the cursor is currently on
dd - delete entire line the cursor is currently on
dw - deletes the word the cursor is currently on
yy - copies entire line the cursor is currently on
yw - copies the word the cursor is currently on
p - (pastes) the previous copied or deleted word or line from: dd, dw, yy, yw
Most of the above commands also work with multipliers while in normal mode
For example try these exercises.
Create a new file and input a line of text using insert mode, then press return to create a new line.
A line of text
Go back to normal mode (Esc) and move cursor down a line (j) if not already.
Type 15 then press i to go back to insert mode, press the - key, then hit Esc. Key sequence: (Esc)15(i)-(Esc)
Notice we now have a series of dashes under the first line ———–
A line of Text
--------------
In case you are confused, let's try another.
Go back into insert mode, add a new line by pressing return, and back to normal mode by pressing Esc.
Type 20, press i, press \*, press Esc.
Your console should now look something like this:
A line of Text
--------------
*******************
Admittedly, it is a bit tricky at first flipping back and forth from insert to normal mode, but once you get the hang it you can see how powerful Vim can become.
Here is a bit more practice.
Press Esc to ensure you are in normal mode. By the way, you can press the escape key repeatedly with no ill effect, so if ever in doubt press Esc again to be sure you are in normal mode.
Using the curser keys or j/k keys position the curser over the **** line we just created. Then press dd to delete the entire line. Do the same with the ---- line. You should now be back to just a single line of text.
With your cursor positioned within the text press yy to copy the entire line. Then press p to paste a copy of the line, notice the line is pasted below the first line.
We can also paste multiple lines by typing 5 then pressing p. You should now have added an additional 5 lines of text, or 7 in total.
A line of text
A line of text
A line of text
A line of text
A line of text
A line of text
A line of text
To delete these extra lines, press gg (to move to the first line) and then j (mode down to second line) your cursor should now be within line 2, type 6 and then press dd. All 6 extra lines should now be deleted and you should again be back to the single line of text.
Well if you followed along this far, you should have enough understanding of Vim to start using it. Continue to practice with simple text files like these to learn the basics. If you want to do something that I have not covered it is most likely possible in Vim, just do a search on Google. As mentioned at the beginning of the guide, this is by no means a complete tutorial, just an introduction so you know Vim well enough to follow along with the programming examples using Vim beginning with the next lesson.
Bonus commands
:! name_of_a_command - runs a command external to Vim, without having to exit Vim.
For example, :! dir will toggle back to the console to display the files within the directory you are currently working in, without quitting the editor. Simply press enter when done viewing to return to toggle back to Vim at the point you left. Can be used with most console commands.
If you came to this page as part of the 2.0 lesson series, you are now ready to move on to the next lesson Using the gcc compiler.
